Create an API endpoint in your backend that generates AuthKit tokens. This endpoint should be called by your frontend when a user wants to connect an integration.
Next.js App Router
Next.js Pages Router
Express.js
FastAPI
Flask
Create a file at app/api/authkit/route.ts:
import { NextRequest, NextResponse } from "next/server";import { AuthKitToken } from "@picahq/authkit-token";const corsHeaders = { "Access-Control-Allow-Origin": "*", "Access-Control-Allow-Methods": "POST, GET, PUT, DELETE, OPTIONS", "Access-Control-Allow-Headers": "Content-Type, Authorization",};export async function OPTIONS(req: NextRequest) { return NextResponse.json({}, { headers: corsHeaders });}export async function POST(req: NextRequest) { try { // Get the user's ID from your auth system // This is just an example - use your actual auth logic const userId = req.headers.get("x-user-id"); if (!userId) { return NextResponse.json( { error: "Unauthorized" }, { status: 401, headers: corsHeaders } ); } const authKitToken = new AuthKitToken(process.env.PICA_SECRET_KEY!); const token = await authKitToken.create({ identity: userId, // Your user's unique identifier identityType: "user" // user, team, organization, or project }); return NextResponse.json(token, { headers: corsHeaders }); } catch (error) { return NextResponse.json( { error: "Failed to generate token" }, { status: 500, headers: corsHeaders } ); }}
Create a file at pages/api/authkit.ts:
import type { NextApiRequest, NextApiResponse } from "next";import { AuthKitToken } from "@picahq/authkit-token";export default async function handler( req: NextApiRequest, res: NextApiResponse) { if (req.method !== "POST") { return res.status(405).json({ error: "Method not allowed" }); } try { // Get the user's ID from your auth system const userId = req.headers["x-user-id"] as string; if (!userId) { return res.status(401).json({ error: "Unauthorized" }); } const authKitToken = new AuthKitToken(process.env.PICA_SECRET_KEY!); const token = await authKitToken.create({ identity: userId, identityType: "user" }); res.status(200).json(token); } catch (error) { res.status(500).json({ error: "Failed to generate token" }); }}
import express from "express";import { AuthKitToken } from "@picahq/authkit-token";const app = express();app.use(express.json());app.post("/api/authkit", async (req, res) => { try { // Get the user's ID from your auth middleware const userId = req.user?.id; if (!userId) { return res.status(401).json({ error: "Unauthorized" }); } const authKitToken = new AuthKitToken(process.env.PICA_SECRET_KEY!); const token = await authKitToken.create({ identity: userId, identityType: "user" }); res.json(token); } catch (error) { res.status(500).json({ error: "Failed to generate token" }); }});
from typing import Optionalfrom fastapi import FastAPI, HTTPExceptionfrom pydantic import BaseModelfrom authkit_token import AuthKitToken, IdentityTypeapp = FastAPI()# Initialize the client with your API key# In production, load this from environment variablesauthkit_client = AuthKitToken("sk_live_your_api_key_here")class TokenRequest(BaseModel): identity: Optional[str] = None identity_type: Optional[IdentityType] = None@app.post("/authkit-token")async def create_authkit_token(request: TokenRequest): # Create the token asynchronously token = await authkit_client.create_async( identity=request.identity, identity_type=request.identity_type ) if token is None: raise HTTPException( status_code=500, detail="Failed to create token" ) return token
from flask import Flask, jsonify, requestfrom authkit_token import AuthKitTokenapp = Flask(__name__)# Initialize the client with your API key# In production, load this from environment variablesauthkit_client = AuthKitToken("sk_live_your_api_key_here")@app.route("/authkit-token", methods=["POST"])def create_authkit_token(): data = request.get_json() or {} identity = data.get("identity") identity_type = data.get("identity_type") # Create the token token = authkit_client.create( identity=identity, identity_type=identity_type ) if token is None: return jsonify({"error": "Failed to create token"}), 500 return jsonify(token)
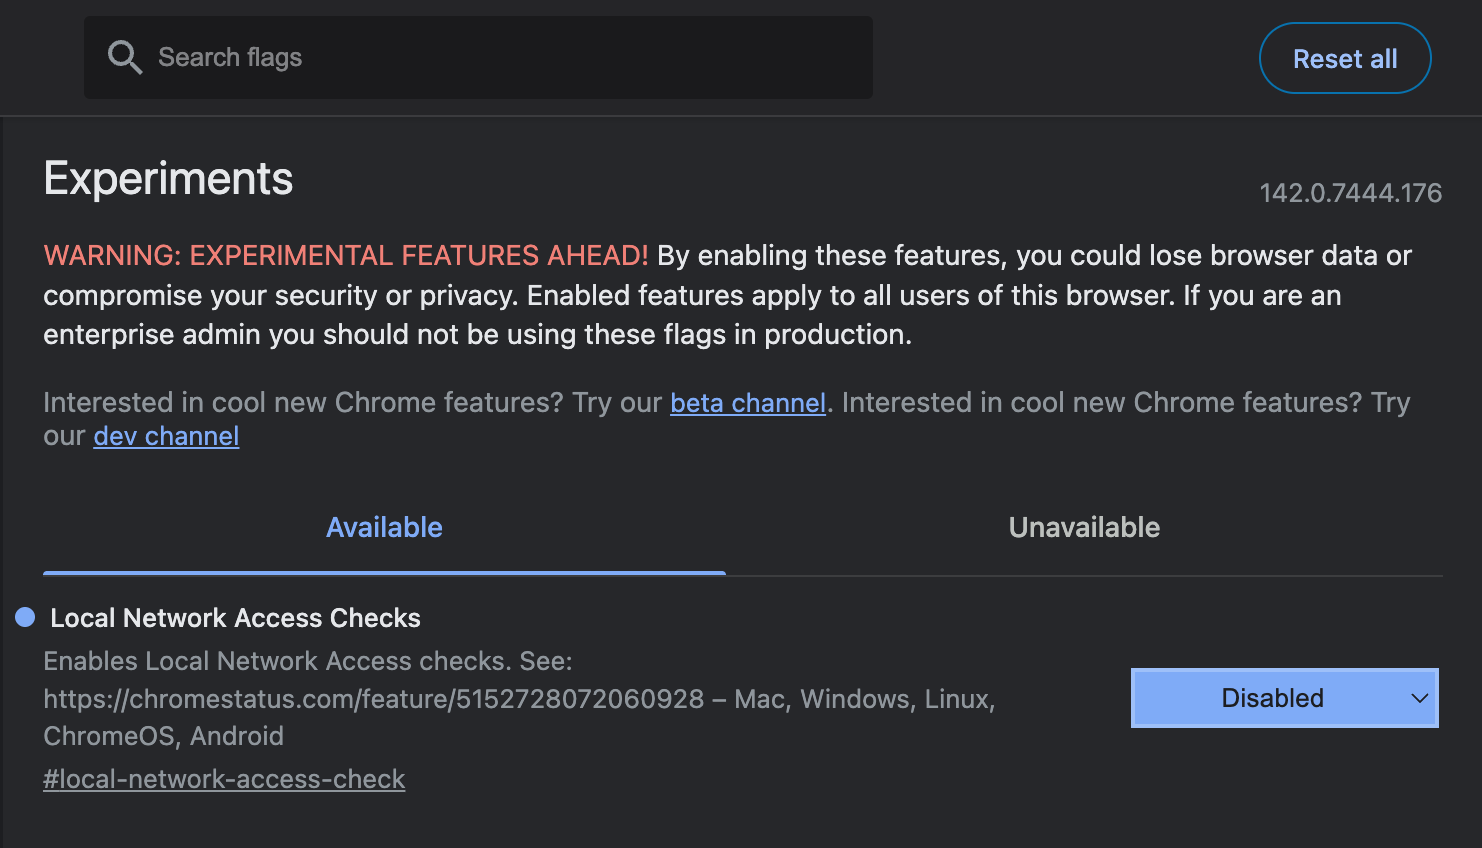
Chrome Users: If you’re developing locally, you may need to disable Local Network Access Checks in Chrome flags. Navigate to chrome://flags, search for Local Network Access Checks, and set it to Disabled.
The name of a specific integration to open directly (e.g., “Google Sheets”, “Slack”). If provided, AuthKit will skip the integration list and open directly to that integration’s authentication flow.
Toggle integrations: Enable or disable which integrations appear in your AuthKit modal
Set OAuth credentials: For OAuth integrations, provide your own Client ID and Client Secret to use your OAuth apps
By default, integrations are not visible. You can selectively enable only the integrations your users need. For more details on managing integrations and OAuth apps, see the Management guide.