- A database to store and update data.
- An integration layer to send emails, connect APIs, or trigger workflows.
- SQL databases, migrations, ORMs
- OAuth flows, SMTP servers, or 3rd-party email APIs
- Hours of boilerplate before you even ship your MVP
- Cursor IDE with any AI model of your choice (Claude 3.5 Sonnet, GPT-4, etc.)
- Next.js App Router with TypeScript and Tailwind
- Pica for email integration
- InstantDB for real-time database
Why Pica + InstantDB?
- InstantDB → real-time, schema-less database. Add data, query it, and get live updates — no setup required.
- Pica → A unified API platform with hundreds of integrations (Gmail, Slack, Notion, QuickBooks, Shopify, and more). No need for custom OAuth workflows—just one secure API key handles everything.
- Next.js → modern React-based full-stack framework.
- 📧 Mailing lists (what we’ll demo here)
- 💬 Real-time chat apps
- ✅ To-do apps with email reminders
- 📊 Admin dashboards with live updates
What You’ll Get
- A user signs up → their info appears in your dashboard instantly.
- At the same time → they get a personalized Gmail welcome email.
- All this with less than 150 lines of code.
Step-by-step build with prompts
1
Create Next.js App (App Router)
- Initialize the app with TypeScript, ESLint, Tailwind, and App Router.
Terminal Commands
Terminal Commands
- Install dependencies and Start the dev server and verify the app loads.
Start Development Server
Start Development Server
2
Environment Variables
- Create a
.env.localwith the following keys:NEXT_PUBLIC_INSTANT_APP_ID=PICA_SECRET_KEY=PICA_GMAIL_CONNECTION_KEY=
Environment File Setup
Environment File Setup
- Get values from:
- Pica API keys
- Pica Gmail connection
- Instant DB APP ID: Go to your instant db dashbaord to get this ID.
3
InstantDB Client and Schema (lib/db.ts)
Create the database configuration file and schema.📂
lib/db.tsPaste this prompt into Cursor (or your preferred AI-powered IDE) so it creates the client file:InstantDB Setup Prompt
InstantDB Setup Prompt
4
Email API Route (app/api/send-welcome-email/route.ts)
Create the API endpoint for sending welcome emails via Pica Gmail passthrough.📂
app/api/send-welcome-email/route.tsPaste this prompt into Cursor to create the API route that sends email via Pica Gmail passthrough:Email API Route Prompt
Email API Route Prompt
5
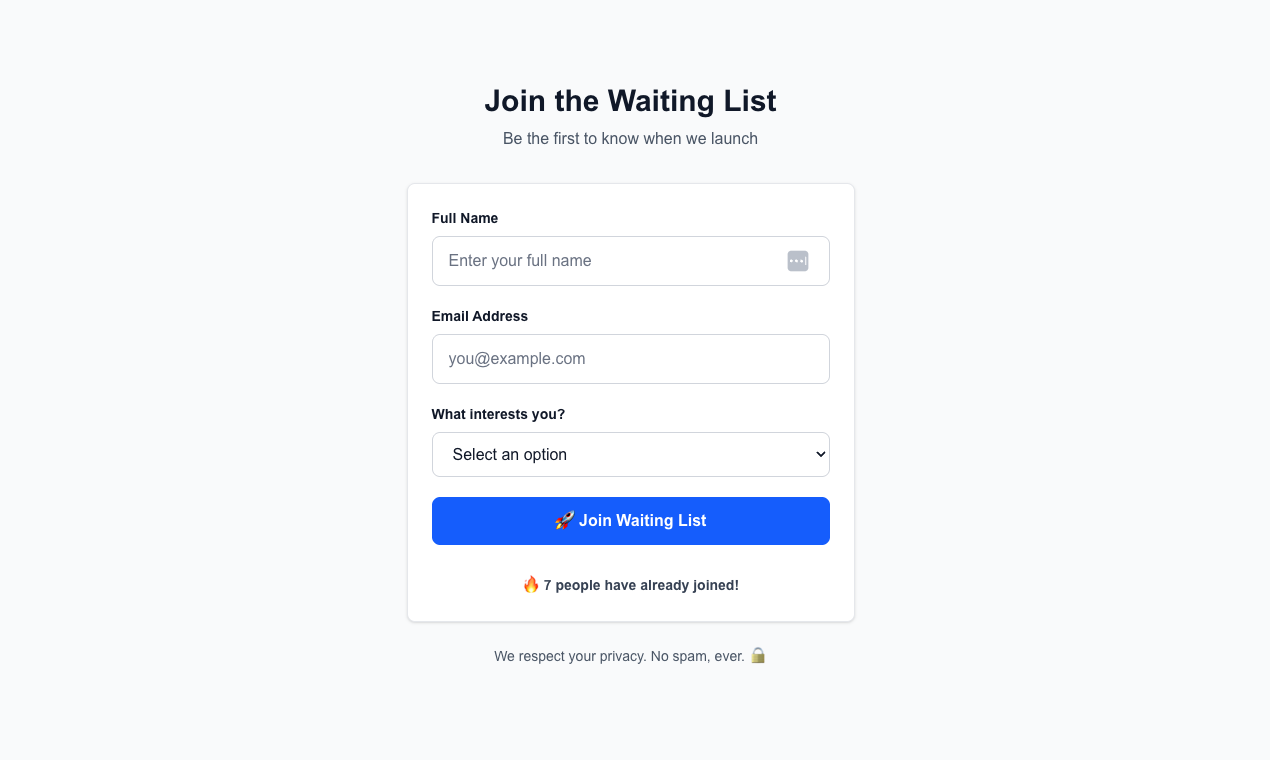
Create the UI (app/page.tsx)
Create the main signup form component with real-time updates.📂
app/page.tsxUse this prompt in Cursor to generate the client form page. It includes loading/success/error states and uses InstantDB transactions correctly.UI Form Prompt
UI Form Prompt
6
Admin Dashboard (app/admin)
Create admin page and dashboard table with filters and actions.📂
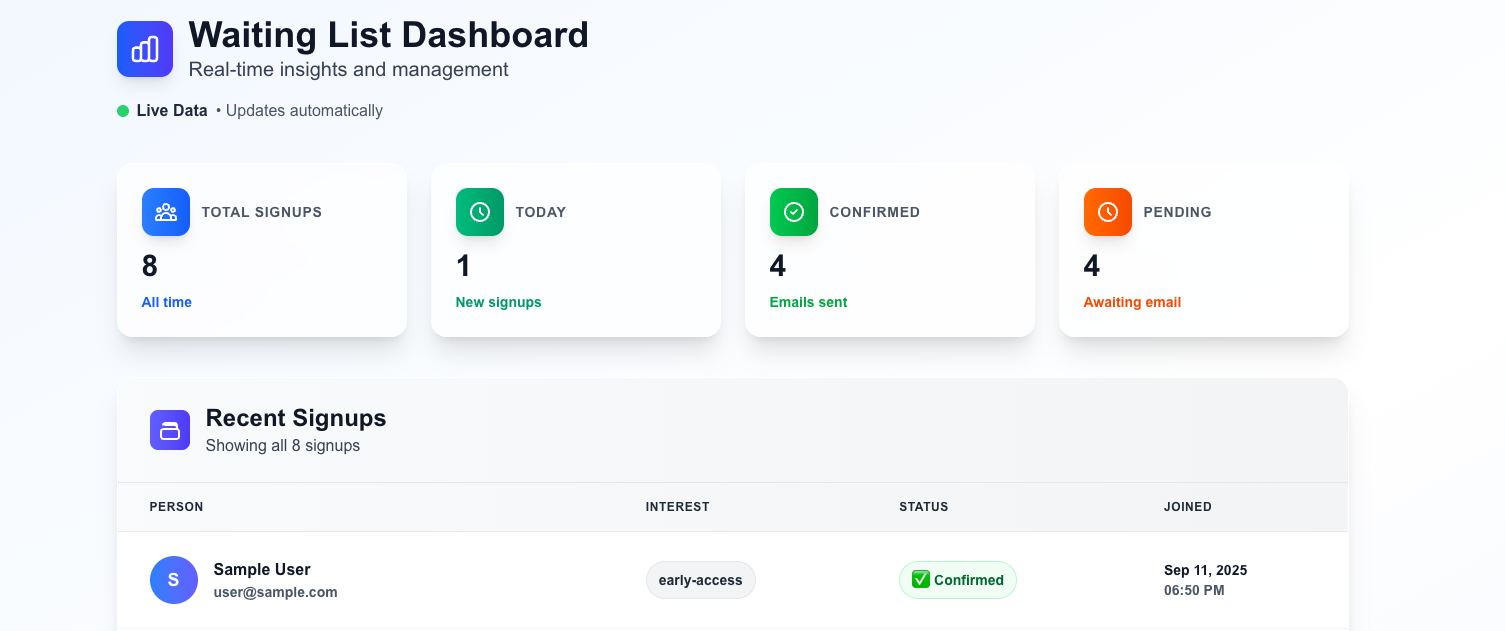
app/admin/page.tsxUse this prompt in Cursor to generate the admin page and dashboard table with filters and actions.Admin Dashboard Prompt
Admin Dashboard Prompt
Great job! You’ve built a waitlist app with real-time signups, automatic welcome emails, and an admin dashboard to manage it all.
Source Code
View the complete source code for this example on GitHub